
Preparing for a termite inspection mostly means giving the inspector clear access to the places termites hide. You do not need to treat anything, empty cabinets, or move furniture out of the house. The practical work is simple: clear the openings to the attic and crawl space, pull stored items a few feet away from interior and garage walls, secure pets, unlock gates and side yards, trim plants that touch the foundation, and write down where you have noticed possible signs. A half hour of preparation the day before can be the difference between a thorough inspection and one with areas noted as inaccessible.
Key Takeaways
- Preparation is about access: attics, crawl spaces, garage walls, and the foundation line are the areas an inspector most needs to see.
- Move stored items a few feet away from walls rather than emptying rooms; a clear strip along each wall is usually enough.
- Leave possible signs — mud tubes, droppings, damaged wood — exactly where you found them. They are evidence, not mess.
- Secure pets and unlock gates so the inspector can work the full exterior without interruptions.
- Write down where you saw signs and have any prior inspection or treatment paperwork ready to hand over.
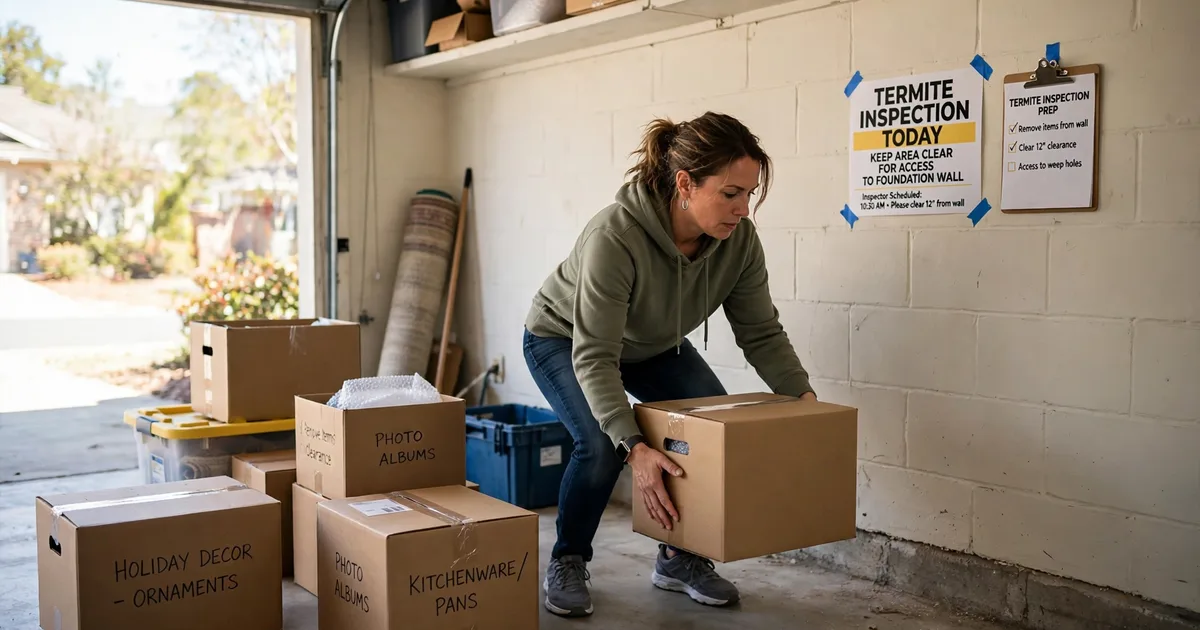
Table of Contents
- Why Access Matters So Much
- Clear the Attic and Crawl Space Openings
- Move Items Away From Walls and the Garage Perimeter
- Secure Pets and Unlock Gates
- Trim Plants and Clear the Foundation Line
- Write Down Where You Have Seen Signs
- Quick Preparation Checklist
- Have Prior Reports and Paperwork Ready
- When to Call a Professional
- Frequently Asked Questions
Why Access Matters So Much
Termites do most of their work where people rarely look: inside crawl spaces, along foundation walls, in attic framing, and behind the stored clutter of a garage. An inspector works through those areas with a flashlight, looking for mud tubes, droppings, damaged wood, and the moisture conditions that attract colonies. Anything that blocks the view — boxes stacked against a wall, a water heater closet packed to the ceiling, shrubs grown over the foundation — becomes a blind spot.
Inspectors note inaccessible areas on their reports, and a blind spot is not the same as a clear result. Our termite inspection guide for California homeowners walks through what an inspector checks area by area, and nearly every item on that list depends on being able to reach the spot. Preparation is how you make sure the inspection you scheduled is the inspection you actually get.
Clear the Attic and Crawl Space Openings
Start with the two openings homeowners most often forget. Attic access panels are frequently inside a closet, a hallway, or the garage ceiling, and closets in particular tend to fill up right under the panel. Clear whatever sits beneath and around the attic opening so a ladder can be set up and the panel removed without moving your belongings first. If shelves or hanging clothes crowd the opening, shift what you can to one side.
The crawl space opening matters just as much. Subterranean termites travel from the soil up foundation walls and piers, and the crawl space is where that activity is most visible. Make sure the access door or panel opens freely, and clear stored items, garden tools, or debris piled against it. If the opening is inside the home — some are in a closet floor or utility area — clear that space the same way. You do not need to enter the crawl space yourself.
Move Items Away From Walls and the Garage Perimeter
Termite evidence shows up at the base of walls: along baseboards, at the bottom of door frames, and where garage stem walls meet the slab. Stored items pressed against those walls hide exactly the strip of the house an inspector needs to see.
Walk the garage first, since it is usually the most crowded and one of the most important areas. Pull boxes, bins, paint cans, and equipment a few feet out from the perimeter walls. Inside the house, do the same where it is practical: move what is stored under sinks, in water heater closets, and against the walls of laundry rooms and bathrooms, where plumbing and moisture already raise the stakes. You are not emptying rooms or shifting heavy furniture across the house. A clear strip of a few feet along each wall gives the inspector room to look, tap, and check the baseboards and framing.
Secure Pets and Unlock Gates
An inspection moves back and forth between the inside of the home, the garage, and the yard, often with gates and doors open. Plan for pets ahead of time: keep dogs and cats in a closed room the inspector does not need to enter, with a note on the door, or arrange for them to be with a family member during the visit.
Unlock side gates and any padlocks on yard access points before the appointment. Inspectors check the full exterior — fence lines where wood meets soil, deck posts, and the foundation on every side of the house, not just the front. A locked gate usually means that side of the home goes uninspected or the visit has to be rescheduled. If a gate has a code or a sticky latch, leave a note or mention it when you schedule.
Trim Plants and Clear the Foundation Line
The foundation line is where subterranean termites make the jump from soil to structure, and it is one of the most important views of the whole inspection. Shrubs, vines, and dense ground cover grown right up against the house can hide mud tubes and the wood-to-soil contact that invites them. You can read more about how these tubes work in our article on termite mud tubes on the foundation.
Before the appointment, trim back plants touching the siding and foundation so there is a visible gap along the base of the house. Move firewood stacks, lumber piles, and mulch built up high against the wall a short distance away if you can. Pull back stored items, hoses, and yard tools leaning on the exterior walls. The goal is a foundation line the inspector can walk and see from the ground to the first course of siding, all the way around.
Write Down Where You Have Seen Signs
You live in the house every day, and you have likely noticed things an inspector would want to know: a pile of small pellets that keeps appearing under a window frame, wings on a sill in spring, a baseboard that sounds hollow, a door that started sticking. Before the visit, walk through the home and write these down by room and location. A short list on paper or in your phone is fine.
Leave the signs themselves exactly where they are. Do not sweep up pellets, knock down mud tubes, or scrape at damaged wood before the appointment — those materials are the evidence the inspector uses to identify what is active and where. Our guide to termite droppings and frass explains why the pellets matter and what they can tell an inspector. Photos with dates help too, especially for signs that come and go, like swarmers.
Quick Preparation Checklist
| Area | What to Do | Why It Helps |
|---|---|---|
| Attic opening | Clear the closet or space below the access panel | Lets the inspector set a ladder and enter |
| Crawl space opening | Make sure the panel opens and the area in front is clear | The crawl space shows subterranean activity first |
| Garage | Pull stored items a few feet from perimeter walls | Exposes stem walls and slab edges to view |
| Interior walls | Clear under sinks and along baseboards where practical | Baseboards and plumbing walls are common sign locations |
| Pets | Confine to a closed room or off the property | Doors and gates stay open during the visit |
| Gates and side yards | Unlock all exterior access points | The inspection covers every side of the house |
| Foundation line | Trim plants and move firewood and debris off the wall | Mud tubes and soil contact show at the base of the house |
| Your notes | List signs by room, with dates and photos if you have them | Directs attention to areas you already suspect |
| Paperwork | Set out prior reports and treatment records | Gives the inspector the home’s history |
Have Prior Reports and Paperwork Ready
If the home has been inspected or treated before, gather whatever paperwork you have: earlier inspection reports, treatment records, and any repair documentation. A prior report tells the inspector where activity was found before, what was done about it, and which areas deserve a second look. It also helps distinguish old, repaired damage from something new.
If you do not have any paperwork, that is fine — it is helpful to have, not a requirement for the visit. What matters most is access and your own notes about the home’s history: known leaks, past water damage, additions or remodels, and any wood that has been replaced. Moisture history matters because damp wood is what draws colonies in, a connection covered in our complete guide to termites in Central Valley homes.
When to Call a Professional
Call to schedule an inspection rather than waiting if you are seeing signs now: pellets that return after cleaning, mud tubes on the foundation, wings or live insects indoors, or wood that sounds hollow or feels soft. Those are the situations where preparation is simply the step before a prompt appointment. You should also schedule ahead of real estate transactions, since a report is a standard part of many California home sales, and before starting repairs on wood you suspect is damaged, so you know whether you are looking at termites, water damage, or both.
If an inspection does find activity, the inspector will explain the findings and the options that fit them. Treatments are applied according to the product label and California regulations. What a treatment costs depends on factors like the species involved, where the activity is, and how much of the structure is affected — our overview of termite treatment cost factors explains those variables, and our termite control service page describes the services we provide in San Joaquin and Stanislaus Counties.
Frequently Asked Questions
Do I need to leave the house during a termite inspection?
No. An inspection is visual and observational, and homeowners are commonly home for it. Being there is often useful: you can point out the signs you noted, open anything the inspector cannot, and hear the findings explained as they come up. You will just want pets secured and a path kept clear.
Should I clean up mud tubes or droppings before the inspector arrives?
No — leave them in place. Mud tubes, pellet piles, wings, and damaged wood are the physical evidence an inspector uses to identify the pest and judge whether activity is current. Sweeping them away before the visit removes information that cannot be recovered and can make an active problem harder to confirm.
What if my attic or crawl space cannot be opened?
Tell the company when you schedule. If an opening is painted shut, blocked by a fixture, or genuinely unsafe to enter, the inspector will note that area as inaccessible on the report rather than guessing about it. A note of inaccessibility is honest, but it leaves that part of the home unchecked, so clearing access beforehand is worth the effort whenever it is possible.
Do I have to move heavy furniture?
Generally, no. Inspectors work around ordinary furniture. What matters is the strip along the walls, especially in garages, utility areas, and rooms with plumbing. If one very heavy piece sits against a wall where you have seen signs, mention it when you schedule and ask whether it needs to move.
What should I do on the day of the appointment?
Do a final walk-through: gates unlocked, pets secured, attic and crawl space openings clear, and your notes and paperwork set out. Then be available to answer questions about leaks, past repairs, and where you have seen signs. That routine covers nearly everything an inspector needs from you.
Preparing well makes the inspection faster and, more importantly, more complete — every wall the inspector can see is a question answered instead of left open. If you are seeing signs around your Modesto-area home, or you need an inspection for a home sale, Call (209) 581-5562 or request a free estimate and we will schedule a visit and walk you through what we find.
By the Pentecost Pest Control Editorial Team
This article is for general educational purposes only. Pest conditions, regulations, and treatment options vary by property and situation. Contact a licensed pest control professional for an inspection.