
A termite inspection is a systematic visual examination of a home’s accessible areas for evidence of termites and other wood-destroying pests: mud tubes, frass, damaged wood, discarded wings, and moisture conditions that invite them. The inspector works through the exterior, the interior, the attic, and the crawl space in turn, tapping and sounding wood where it can be reached, then documents everything found — including areas that could not be accessed — and reviews the findings with you so you know what was seen, what it means, and what your options are. This walkthrough follows the visit step by step, so you know what the inspector is doing in each part of your home and why.
Key Takeaways
- A termite inspection is a visual examination of accessible areas: exterior, interior rooms, attic, and crawl space.
- The inspector looks for evidence — mud tubes, frass, wings, damaged wood — and for conditions like moisture and wood-to-soil contact that invite termites.
- Sounding wood with a tap and checking suspect spots helps find damage hidden under an intact surface.
- Areas the inspector cannot reach are documented as inaccessible rather than silently skipped.
- The visit ends with documented findings and an explanation, which is the basis for any treatment or repair decision.
- Step 1: Scheduling and Arranging Access
- Step 2: The Exterior Inspection
- Step 3: The Interior Inspection
- Step 4: The Attic and Crawl Space
- Step 5: Sounding and Checking the Wood
- Step 6: Documenting the Findings
- Step 7: Reviewing the Findings With You
- What the Inspection Covers, Area by Area
- What an Inspection Cannot See
- When to Call a Professional
- Frequently Asked Questions
Step 1: Scheduling and Arranging Access
When you schedule, expect to talk through a few practical points: the size and construction of the home, any signs you have noticed and where, and which areas need to be reachable on the day. Access is the part homeowners control, and it directly affects how complete the inspection can be.
Useful preparation is simple: make sure the attic hatch and crawl space entry are reachable and not blocked by storage, and move items away from garage walls and the water heater so those walls can be seen. Clearing a little space under sinks helps too, since plumbing walls are a common area of interest. Anything you have found — a frass pile, a tube, a spot that sounds hollow — is worth pointing out when the inspector arrives rather than cleaning up first. The evidence is the starting map.
Step 2: The Exterior Inspection
The inspector’s first circuit is outside, because subterranean termites start in the soil and the exterior is where their routes into the home are most visible. The foundation is the focus: the inspector looks along concrete stem walls, piers, and slab edges for mud tubes, especially the sheltered places tubes hide — behind shrubs and mulch, at plumbing penetrations, where siding or stucco runs close to the ground, and along cracks and joints.
The exterior pass also reads the conditions around the home. Wood-to-soil contact, such as a fence post or deck support touching the ground by the house, firewood stacked against a wall, debris in contact with soil, mulch piled high against the foundation, and spots where irrigation keeps foundation soil wet all get noted. These do not prove termites are present, but they are the invitations termites accept, and they become part of the findings. Eaves, fascia, and exterior trim are checked for kick-out holes and frass suggesting drywood activity above ground.
Step 3: The Interior Inspection
Inside, the inspection is room by room, with attention to the places termite evidence collects: windowsills and frames where swarmers and wings gather, baseboards and door frames that can be tapped for a hollow sound, and walls below windows where paint may blister over thinned wood. The signs of termites room-by-room checklist describes what this evidence looks like when a homeowner spots it between inspections.
Plumbing areas get particular attention — under sinks, around tubs and showers, at the water heater — because moisture concentrates there and damp wood is what subterranean termites favor. The garage is part of the interior pass as well: its foundation walls and stem walls are a common place for tubes, often hidden behind stored items, which is why clearing those walls beforehand matters. Throughout, the inspector connects the inside picture to the outside one: a tube on an exterior wall and hollow-sounding wood on the other side of that wall tell one story together.
Step 4: The Attic and Crawl Space
These two spaces are where an inspection earns its keep, because they expose the framing that the rest of the visit can only infer. In the attic, the inspector checks rafters, joists, and framing for drywood evidence — frass pellets on insulation or stored items below the wood, kick-out holes, and galleries where wood is reachable — as well as signs of moisture from the roof above.
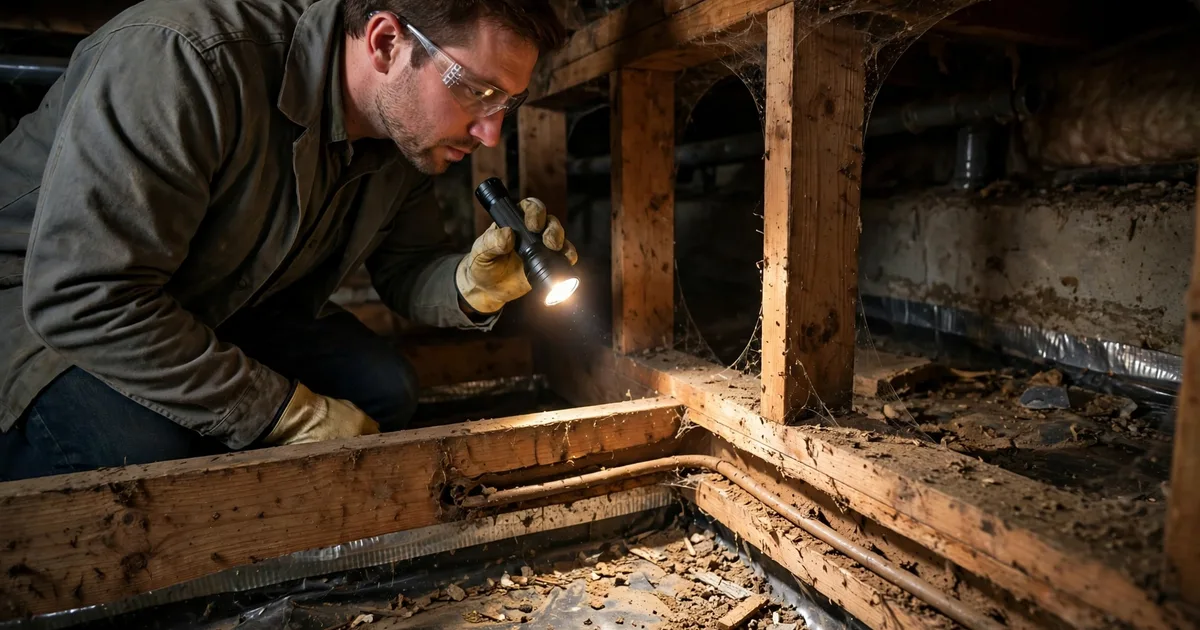
In the crawl space, the inspector works along the piers, stem walls, sill plates, and floor joists. This is prime subterranean territory: tubes running up piers, soil conditions under the home, wood-to-soil contact at supports, and the condition of the sill and joists the tubes lead to. Lighting is a flashlight and space is tight, but this is where hidden activity is most often confirmed or ruled out. If either space cannot be entered, that limitation is recorded, which leads to the honesty point covered below.
Step 5: Sounding and Checking the Wood
Termites hollow wood from the inside while leaving the surface looking sound, so a purely visual pass can miss feeding that has not yet broken the surface. Inspectors counter that by sounding the wood: tapping along baseboards, frames, sills, and joists and listening for the change from a solid knock to a dull, papery response that suggests tunneling behind the surface. Suspect spots may be probed gently to check whether the surface gives over a void.
What this step can and cannot do is worth understanding. Sounding maps where wood is likely damaged and how far the suspect stretch runs, and combined with the evidence around it — tubes below, frass above, moisture nearby — it builds the case for what is going on inside a given member. It does not measure exactly how much sound wood remains inside a structural piece; that judgment is part of the findings, and repair questions for framing are often a contractor’s scope once the pest side is settled. The early signs of termites article covers the sound clues a homeowner can check by observation between inspections.
Step 6: Documenting the Findings
Findings are recorded as the inspection proceeds: where tubes were found and what they connect, where frass or wings were seen, which wood sounded hollow or showed damage, and where moisture or wood-to-soil contact conditions exist. Just as important, the record notes what could not be inspected — a crawl space with no usable entry, an attic area blocked by stored items or construction, wall sections concealed by finishes or fixtures.
Documentation is what turns a walk-through into something you can act on. It separates active evidence from old evidence, pest damage from water damage, and findings from conditions that invite future problems. It is also the basis for any written recommendations: treatment options are tied to specific findings in specific places, not to a general impression of the house.
Step 7: Reviewing the Findings With You
Expect the inspector to explain what was found and where, whether the evidence indicates active termites or past activity, which type of termite is involved, and what conditions around the home are contributing. If treatment is warranted, the options are explained in terms of the findings — what each approach addresses and what it does not. Treatments are applied according to the product label and California regulations.
This is the moment to ask questions: which areas could not be inspected, what would the inspector watch if you decided to monitor instead, and what the findings mean for a sale, a purchase, or a repair you are planning. Cost, when it is discussed, follows the findings — the factors that shape it are covered in our overview of termite treatment cost factors.
What the Inspection Covers, Area by Area
| Area | What the inspector looks for |
|---|---|
| Exterior and foundation | Mud tubes, wood-to-soil contact, moisture and drainage conditions, frass at eaves and trim |
| Interior rooms | Wings and swarmers at windows, hollow-sounding trim and frames, blistered paint, frass piles |
| Plumbing areas and garage | Moisture around fixtures, tubes on garage stem walls, evidence near water lines |
| Attic | Frass on insulation, kick-out holes, drywood galleries in framing, signs of roof moisture |
| Crawl space | Tubes on piers and stem walls, condition of sills and joists, soil moisture, wood-to-soil contact |
What an Inspection Cannot See
An honest limitation belongs here: a termite inspection is a visual inspection of accessible areas. Inspectors do not open walls, lift flooring, or dismantle construction, so wood sealed inside a finished wall or under a floor can hide feeding that leaves no reachable evidence. Areas blocked by storage, low clearance, or construction are noted as inaccessible in the findings rather than skipped silently, and a finding of no visible evidence means exactly that: none was visible in the areas that could be examined that day.
This is not a flaw unique to one company; it is the nature of a non-invasive inspection. It is also why new evidence appearing later — a swarm, a fresh frass pile — is worth acting on even in a home that was inspected before. Our termite inspection guide for California homeowners and the complete guide to termites in Central Valley homes put the inspection in its wider context.
When to Call a Professional
Call to schedule an inspection when:
- You have found wings, frass, mud tubes, or wood that sounds hollow and want the signs identified and mapped
- You are buying or selling a home and need documented findings
- An area of your home — crawl space, attic, a wall you suspect — has never been looked at
- A previous problem was treated and you want current activity checked
- You simply want a documented picture of where your home stands
Pentecost Pest Control is a family-owned company at 3501 Coffee Rd in Modesto, serving homes throughout San Joaquin and Stanislaus Counties. Our termite control service page outlines how service starts with an inspection like the one described here.
Frequently Asked Questions
How long does a termite inspection take?
It varies with the size of the home, how much of it is accessible, and how much evidence there is to document. A small home with clear access is a shorter visit than a large home with a full crawl space, attic, and findings in several areas. Describing the home’s size and construction when you schedule gives a reasonable expectation.
Do I need to leave the house during the inspection?
No. An inspection is a visual examination, and homeowners are commonly present — which is useful, since you can point out anything you have noticed and hear the findings review in person. Pets simply need to be kept clear of the areas being examined while the inspector is working in them.
What should I do to prepare?
Make the attic hatch and crawl space entry reachable, move stored items away from garage walls, and clear a little space under sinks. Leave any evidence — frass piles, tubes, wings — in place rather than cleaning it up, and note where and when you first saw it. That preparation directly improves how much of the home can be covered.
Will the inspection find termites inside my walls?
It will find the evidence termites leave in accessible areas, and inspectors are practiced at reading indirect signs — sounds, surface changes, tubes, and frass — that point to hidden activity. But an inspection does not open walls, so feeding sealed inside a finished wall with no reachable evidence can go unseen. Inaccessible and concealed areas are noted in the findings so you know what the inspection covered.
What happens if the inspector finds termites?
The findings are explained first: where the activity is, which type of termite, and how extensive the evidence suggests it is. Then the options that fit those findings are laid out, along with any conditions — moisture, wood-to-soil contact — worth correcting. Nothing proceeds until you have considered the findings and asked questions.
Ready to find out what is going on in your home’s wood? Call (209) 581-5562 or request a free estimate — tell us what you have noticed, and we will schedule an inspection and walk you through the findings.
By the Pentecost Pest Control Editorial Team
This article is for general educational purposes only. Pest conditions, regulations, and treatment options vary by property and situation. Contact a licensed pest control professional for an inspection.